Difference between revisions of "SC Profile plots"
From NavykI
| (6 intermediate revisions by 2 users not shown) | |||
| Line 1: | Line 1: | ||
'''Profile plots''' | '''Profile plots''' | ||
| + | |||
| + | Before starting to create the profile plots must be customized the sheet and subsheet for plots in template folder. | ||
| + | *Units: mm | ||
| + | *Dym style : overall scale 1.000 | ||
| + | *Text style - same name as selected in dym style | ||
| + | *See example project 10-001 MS Albatros. | ||
| + | |||
*1. Select '''ShipConstructor / Navigator'''. | *1. Select '''ShipConstructor / Navigator'''. | ||
| Line 11: | Line 18: | ||
*4. Click '''OK'''. | *4. Click '''OK'''. | ||
| − | *5. A new drawing is created. If you set up a template for ProfilePlotDrawing in the ''Templates page'' then the drawing will be a copy of that drawing, otherwise it is a blank drawing.(model | + | *5. A new drawing is created. If you set up a '''template for ProfilePlotDrawing''' in the '''Templates page''' then the drawing will be a copy of that drawing, otherwise it is a blank drawing.(find model in '''NVK09-032 MY Refit''' - for template page) |
| + | |||
| + | |||
| + | '''SC Profile Plots – Options''- be aware the style to Copy must be the dym style name. | ||
| − | |||
*1. Select '''SC Profile Plots / Options''' or click the options button in the Profile Plot Setup dialog. | *1. Select '''SC Profile Plots / Options''' or click the options button in the Profile Plot Setup dialog. | ||
| Line 19: | Line 28: | ||
[[Image:plot6.jpg]] | [[Image:plot6.jpg]] | ||
| − | [[Image: | + | [[Image:plot options.jpg]] |
| + | |||
'''SC Profile Plots - Insert Profile Plots''' | '''SC Profile Plots - Insert Profile Plots''' | ||
| + | |||
*1. Select SC Profile Plots / Insert Profile Plots. The following dialog is displayed. | *1. Select SC Profile Plots / Insert Profile Plots. The following dialog is displayed. | ||
| Line 28: | Line 39: | ||
[[Image:plot2.jpg]] | [[Image:plot2.jpg]] | ||
| − | [[Image:plot3.jpg]] | + | |
| + | [[Image:plot3.jpg]] | ||
| + | |||
*2. Click the '''Filter''' button, and set the options as shown. This will limit the display of the Profile Plot Setup to curved profiles and angles only. BF240x12 are setup as angles in the profile library. | *2. Click the '''Filter''' button, and set the options as shown. This will limit the display of the Profile Plot Setup to curved profiles and angles only. BF240x12 are setup as angles in the profile library. | ||
| + | |||
[[Image:plot4.jpg]] | [[Image:plot4.jpg]] | ||
| + | |||
[[Image:plot5.jpg]] | [[Image:plot5.jpg]] | ||
| + | |||
Latest revision as of 14:37, 25 March 2010
Profile plots
Before starting to create the profile plots must be customized the sheet and subsheet for plots in template folder.
- Units: mm
- Dym style : overall scale 1.000
- Text style - same name as selected in dym style
- See example project 10-001 MS Albatros.
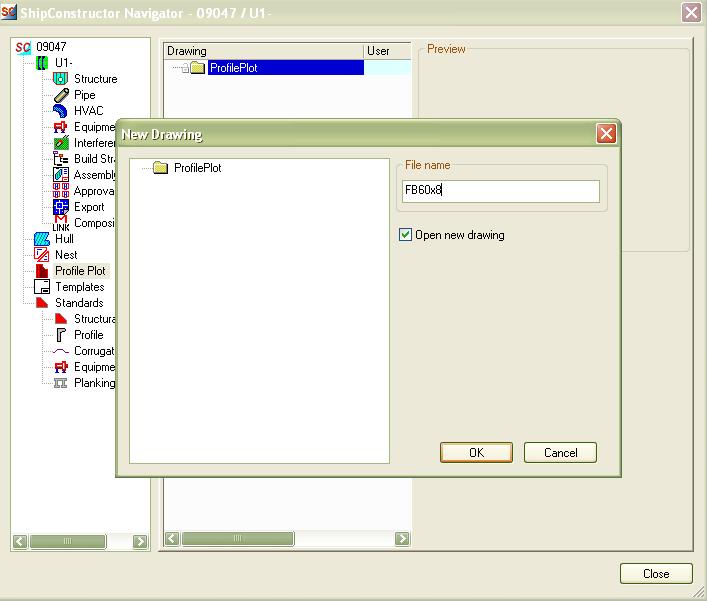
- 1. Select ShipConstructor / Navigator.
- 2. Select the Profile Plots page in the component list.
- 3. Click New.
- 4. Click OK.
- 5. A new drawing is created. If you set up a template for ProfilePlotDrawing in the Templates page then the drawing will be a copy of that drawing, otherwise it is a blank drawing.(find model in NVK09-032 MY Refit - for template page)
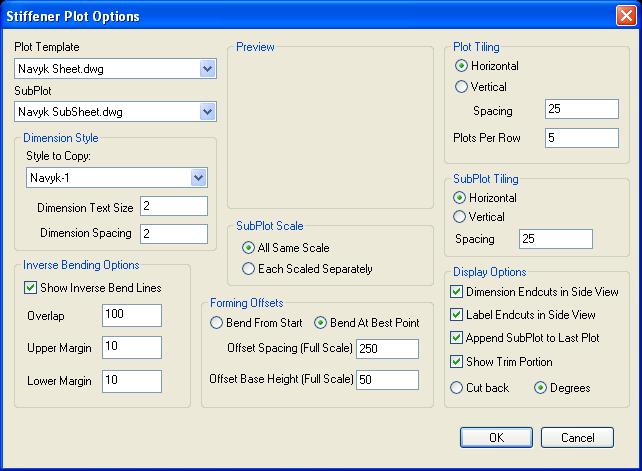
'SC Profile Plots – Options- be aware the style to Copy must be the dym style name.
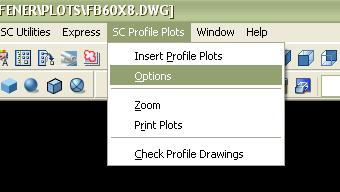
- 1. Select SC Profile Plots / Options or click the options button in the Profile Plot Setup dialog.
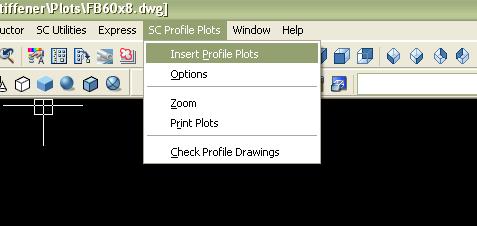
SC Profile Plots - Insert Profile Plots
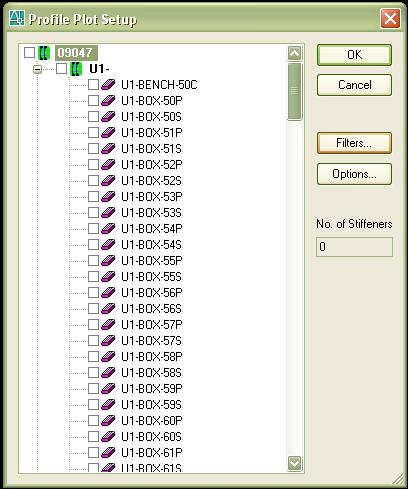
- 1. Select SC Profile Plots / Insert Profile Plots. The following dialog is displayed.
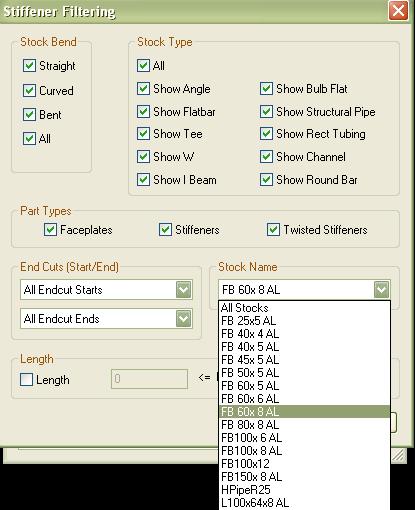
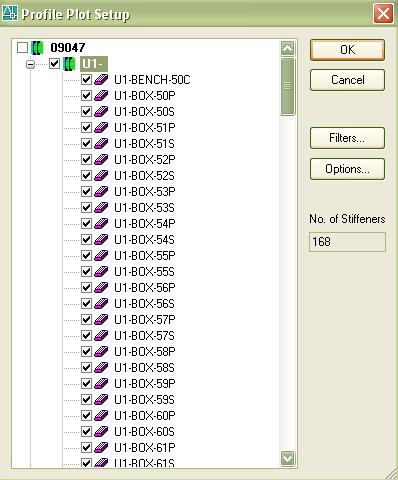
- 2. Click the Filter button, and set the options as shown. This will limit the display of the Profile Plot Setup to curved profiles and angles only. BF240x12 are setup as angles in the profile library.
- 4. Click OK to create the profile plots.
- 5. Insert the profile in 0,0,0
